
Last week, I ordered all of the bits and pieces I needed to get a Raspberry Pi configured to become an Alexa device. It was incredibly easy, the tutorial was very straightforward, and I ended up with something that can do this:
What You Need
If you want to try this, here’s what you’ll need (links and prices from Amazon):
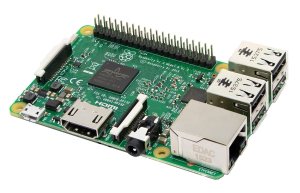
- Raspberry Pi 3 Model B Motherboard – $35.70
- USB 2.0 mini microphone – $8.54

- 8GB micro SD card (with NOOBS preinstalled) – $8.91

Optionally, you might want to protect your Raspberry Pi if you plan to take it anywhere. They make a very nice, inexpensive case for it:
- Official Raspberry Pi 3 Case – $7.42

Finally, there are a few things you’ll need to get it running, but these are things I assume you probably have. If you don’t, I’ve recommended some with the links.
- USB keyboard & mouse (Logitech MK270 Wireless USB keyboard and mouse – $19.95)

I like this one because it’s small, compact, and easy to travel with. Most travel keyboards are garbage, so I tend to lean towards smaller, full-function keyboards instead. (My primary keyboard is a Das Keyboard, much bigger and clickier.) - HDMI monitor (there are way too many options here, any monitor will do. I’m hunting for a tiny one I can travel with. Like 5″ or smaller. But in a secure case, since it will likely see the bottom of my backpack occasionally.)
- Micro-USB Charging Cable (you literally have 100 of these in a drawer. Any of them.)
- 3.5mm audio cable
- Literally ANY speaker that can take a 3.5mm audio cable as input (I used the Nokia MD-12 for mine, but you can certainly find cheaper speakers if you need one.)

The How-To
I would normally give you a run-down of the steps I took, and the issues I faced, but there simply isn’t much point in that. I followed the provided tutorial on GitHub, and it was one of the smoothest experiences I’ve ever had setting something like this up.
https://github.com/alexa/alexa-avs-sample-app/wiki/Raspberry-Pi
My Takeaways
I’m working on a few things to enhance the experience, but here’s my takeaways:
- If you ONLY want an Alexa device, this is probably not the project for you. The Echo Dot is $49.99, and doesn’t require any setup to work. This project, at a minimum cost, is about $53.15. That being said, having an Alexa device that can also run some other services is really compelling. Adding a touchscreen to it would allow you to see the “cards” that Alexa skills produce at http://alexa.amazon.com, for example.
- Each time you power up the Raspberry Pi, you have to manually start all of the services again. I’m hoping that with some creative effort, this might not always be true, but there’s some authentication that happens that requires your monitor, mouse, and keyboard every time you power it up. (This is why I’m looking for travel keyboards and monitors.)
- This was one of my first experiences in the Raspberry Pi ecosystem, and I’m very excited by what I found. There are tons of accessories to enhance and protect your device, and I’m looking forward to seeing where I can take this project forward.

Leave a comment